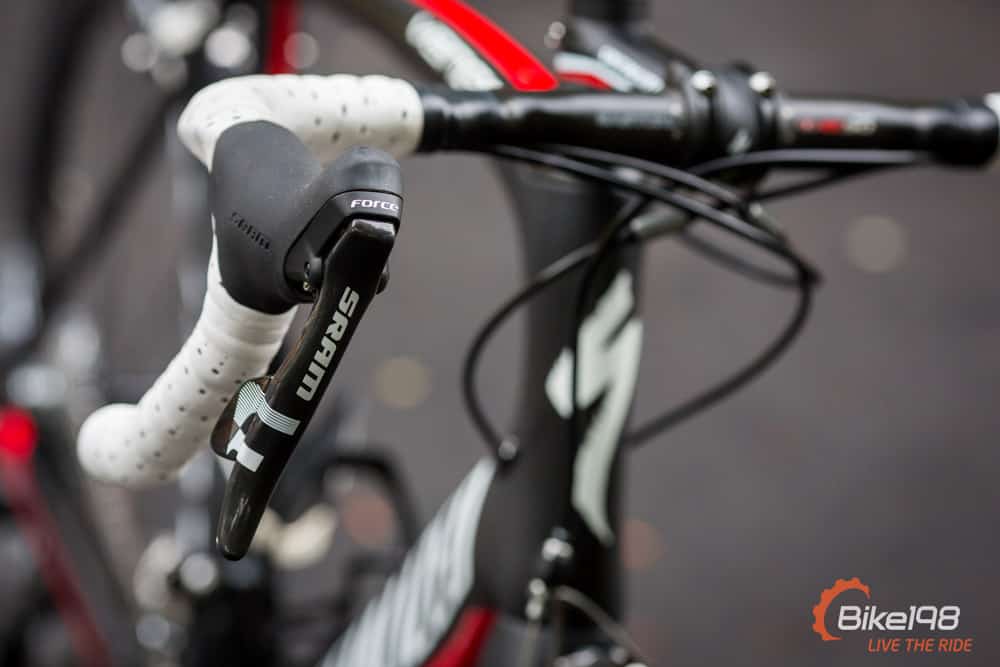
Wrapping your drop handlebars with bar tape does not have to be a complicated install. I know when I first started working on road bikes, the installation of the bar tape on drop bars was the one thing I did not want to tackle, but with a little patience…it is a simple process and you can be up and hammering in no time.
Tools Required: Bar Tape Installation
Installing your bar tape requires a few readily available, common tools:
- Bike Stand
- Allen Wrench Set
- Razor Blade or Sharp Knife
- Scissors
- Electrical Tape
- Tape Measure
Parts Used In This Install
- Bike Ribbon – Eleganza Bar Tape
- FSA Compact K-Wing Drop Bars
- Feedback Sports Bike Repair Stand
- Bike Used: Blue Competition Cycles Nx7
Step 1: Clean Drop Handlebars
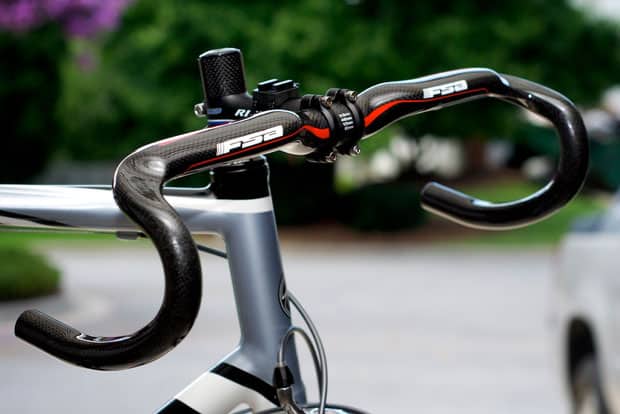
Make sure the surface of your bars are clean. You can use a regular cleaner or rag like you would on any other part of your bike, but make sure it is completely dry and without residue to insure there is not a slick surface between your tape and the bars.
Step 2: Position The Hoods/Brake Levers

The next step in the process is to position the hoods/brake levers if you are installing on new handlebars. If you are just replace existing tape on your road bike, the hoods should already be in the right position. Make any adjustments necessary and tighten the hoods to the handlebars using the required allen wrench. For these Dura Ace levers, use a 5mm that you can find on the outside of the lever under the hood.
Side note: Hood positioning is completely personal preference of the rider. Some riders like to have the hoods parallel to the ground and bars while others prefer having them farther down the drops. For this setup with the K-Wing bars from FSA, the hoods naturally lend themselves to flat style positioning as you can see in the pictures. Once you have the hoods where you think you want them, take a quick spin on the bike before you install the bar tape to make sure.
Step 3: Secure Brake Lines To Handlebar

Next, secure your brake lines to the handlebars. In this install, the FSA K-Wings have a hole in the bars to feed the brake lines through. For more conventional handlebar setups, you are going to use electrical tape to secure the brake line to the handlebars. It typically takes about 3 to 4 electrical tape applications to secure the brake line to your drop bars towards the front of the bottom side of the bars.
Step 4: Start Wrapping the Bars With The Bar Tape
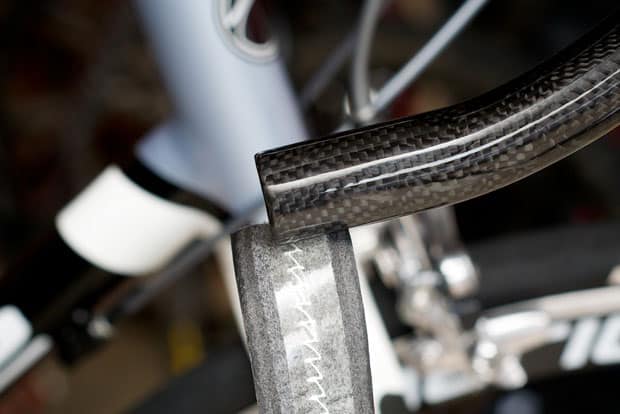
Now it is time to start the wrapping process with the bar tape. Start wrapping the bar tape on your drop bars leaving enough overhang over the end of the bars to install the press fit bar end cap. The compression between the excess bar tape and the handlebar is what keeps the bar end cap secure and provides for a clean installation without having to cut the beginning of the bar tape. The Bike Ribbon Eleganza bar tape has a adhesive backing to help with the install. If you do not have an adhesive backing on your bar tape, you are going to have to carefully hold and pull or attach double sided tape to the end of your bars to keep the bar tape secure as you start your wrap.
Bar Wrapping Direction: There are several schools of thought when it comes to the direction you wrap your drop bars. When you are riding your bike, you are going to naturally twist your hands clockwise on the right side and counterclockwise on the left when you are in the drops or hoods and counterclockwise while on the center flats. If your tape does not have and coloration or contrast, it is typically better to wrap each side so it will want to self tighten in the drops when you ride, or you can wrap it clockwise to make it self tighten while you are in the top of the bars. I spend more time in the drops and hoods, so tightening in the hoods and drops makes more sense for my riding.
In this install, the contrast stitching makes it so that I wanted to wrap in opposite directions on each side so the sides would be mirrors of each other. Long story short, plan your wrap according to how you want the end result setup.
Step 5: Install Bar End Cap and Continue Wrapping

At this point in the process, I like to install the bar end cap to make sure I left enough material off the end of the bar. You don’t want to get completely to the end of the process only to find out you have to unwrap everything and start over.
After you install the cap, continue your bar tape wrap up the bars and to the brake lever/hood. You are going to want to pay close attention to any patterns on your tape and line it up accordingly (see the double stitch in this example). Typically, you are going to wrap your drop bars with less overlap on the bottom section than you do the top due to the design of the bends in drop bars and the fact that you spend more time up on the hoods than you do on the end of the drops. More material is required where you spend the most of your time riding.
Wrap the bar tightly being careful of the thickness and durability of your bar tape. Ideally, you want to wrap the tape as tightly as you can without compromising the construction of the tape to compress any bumps that are going to happen on the bottom of your bars as you navigate bends. A tight wrap also insures that the tape does not move with time as you start to ride and stress the application.
Step 6: Install Hood Piece

Most bar tapes come with a small section that is several inches long that covers the back of your hoods. As you wrap your handlebars around the hoods, there is going to be a gap in the process. This small piece covers that gap. Intall that now by pulling back the hood cover of your brake lever so you can wrap up and over that piece.
Step 7: Wrap The Bar Tape Up and Over The Brake Hood

As you approach the brake hood, put an extra wrap below the hood and then wrap up and around the hood (over the small brake hood piece) and then apply another extra wrap above the hood before you start wrapping the top of your drop bars. After you have successfully passed the brake hood, pull back the rubber hood cover and inspect the install to make sure it is satisfactory before continuing the wrapping process.
Step 8: Continue the Wrap and Repeat
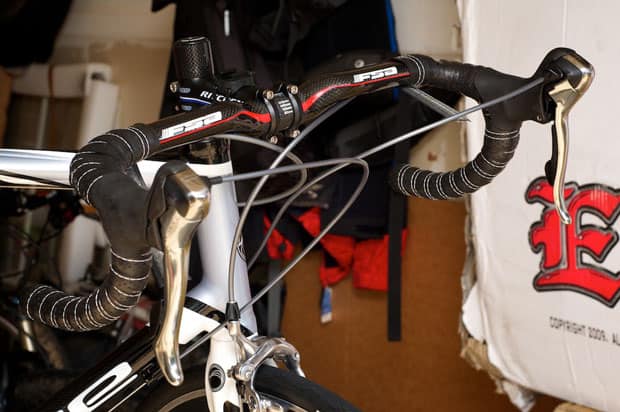
Continue wrapping your bar tape on the top of the bars past the point where you want the bar tape to stop. Naturally, you are going to have more overlap on this point of the bars due to the sharp bend. You also want to have more overlap here than anywhere else as this is the section of the bars that sees the most action while you ride. Keep pulling the bar tape tightly as you wrap.
Repeat the process for the other side before getting ready to cut and tape.
Install Note: How far you wrap the bars up the handlebars on your road bike is a personal preference and dependent upon how much bar tape you have available. Personally, with flat surface bars like the K-Wings, I do not need/want the tape to extend all the way to the center of the bars on the top. I only need enough for my multiple hand positions on the hoods because that is where the real pressure is applied. While climbing on the flats of the bars, the flat surface of these bars provides enough stability and this low pressure area doesn’t require a lot of grip. You may choose to wrap all the way to the center of the bars based off of your preference.
Step 9: Measure Cut Distance For Bar Tape On Handlebars

While this step is not required, I like to have the tape on my handlebars end at the exact same point on both sides to keep things symmetrical. Using a tape measure, measure the same distance on either side where you want your bar tape to end on your road bike’s handlebars.
Step 10: Mark Cut Point With Razor Blade or Sharp Knife

After you have measured exactly where you want to cut your bar tape, use a razor blade or sharp knife to mark your cut line. Run the razor blade perpendicular to the handlebar all the way around the bar. This will give you an exact line you need to cut to end the bar tap installation.
Cut Note: Do not apply too much pressure with the razor blade to the bars. You are using this tool to create a line that you are going to cut with scissors. If you go through the tape and to the bar, you can scratch your aluminum bars or damage your carbon handlebars.
Step 11: Cut Bar Tape Along Marked Line and Rewrap Bar Tape
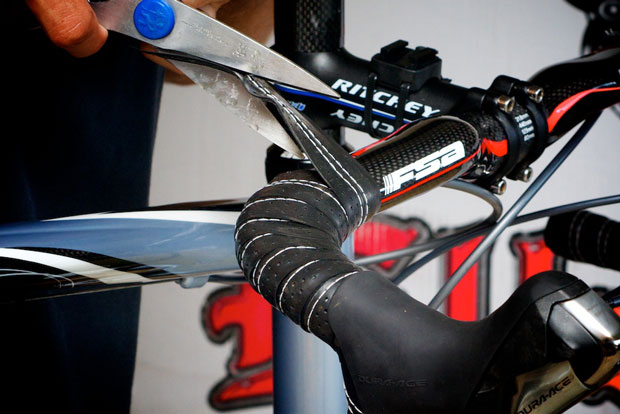
Unwrap the bar tap so you can cut the tape away from the bars. Using a pair of sharp scissors, cut along the line you created with the razor blade and rewrap the bars. You should end up with a straight line perpendicular to the handlebars when you rewrap the bar tape. Repeat for other side.
Step 12: Apply Electrical Tape To Secure Bar Tape On Handlebars
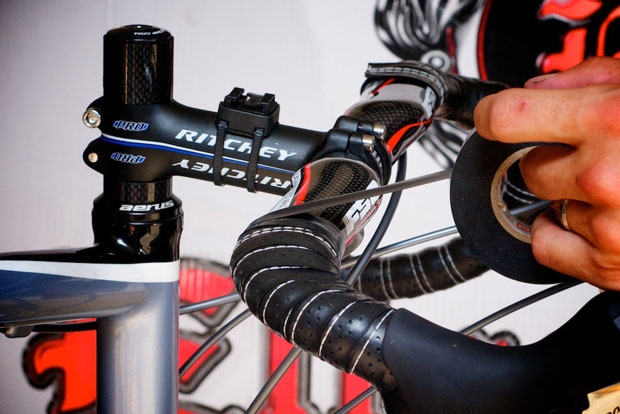
Using black electrical tape (or tape provided with your bar tape), tightly wrap the end of the bar tape to the handlebars to secure it in place. I like to do several, tight wraps to really make sure everything is in place and secure. Cut the electrical tape so the end is not rippled and ends on the bottom side of your handlebars. Repeat for other side.
Complete: Bar Tape Installation

Your bar tape install is complete. Do not let this install process scare you away from trying this on your own. Worst case scenario…you have to unwrap and rewrap the bar tape a couple of times before you get it right. As you can see in the pictures above, the install was not perfect but it was good enough to ride on and the little inconsistencies are only visible if you are really looking for them.
Parts Used: Bike Ribbon – Eleganza Bar Tape | FSA Compact K-Wing Drop Bars | Feedback Sports Bike Repair Stand | Bike Used: Blue Competition Cycles Nx7
