This is the third article in a series of guest posts by Keith Pytlinski. Keith has shot for numerous bike magazines and professional publications…so needless to say…this guy REALLY knows what he is talking about. Mountain biking photography is a hobby of mine and a lot of the riders I ride with…so I found this invaluable information a must post. You can check out more of Keith’s work over at M5 Photography. Here is part 1 and part 2.
In part 2, I introduced a couple of topics and said that I would cover them in part 3. Part 3 is probably geared more towards those who want to take a bit more time in setting up some unique shots and are willing to spend some money to get there. Some of the products covered here will probably cause some sticker shock for a few of you. I suppose while you guys are buying 1,000 dollar wheel sets for your bike, I’m looking for the next step in photo equipment.
Motion Blur in Photography
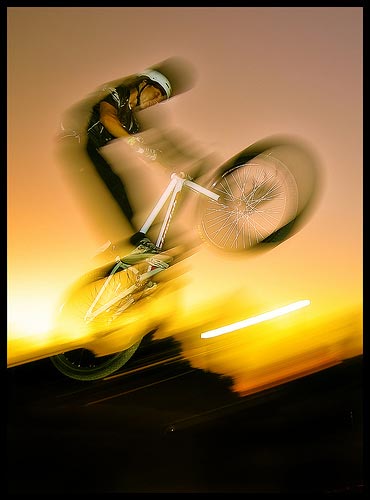
In part 2 Shot 4, the rider was in focus while everything else around him was blurred. I created the motion blur with slow shutter speeds and used the flash to stop the action. In order for you to use this technique you will need to be familiar with using the manual flash on your camera. In other words, the camera won’t tell you that you need flash; you will have to turn the flash on for this type of shot. Using very slow shutters, your subject will typically be blurred. However, by setting/forcing the flash to go off, the action will be stopped. This should be a fun thing for you to experiment with and is something you can try pretty much anywhere. You don’t need a mountain bike shot to practice this technique.
If you are using an external flash on your SLR, you may also want to look into something called 2nd curtain sync. This is a really fun technique where the flash goes off at the very end of the exposure, allowing for some interesting light streaks and motion blur in the back ground. Not every camera/flash combo allows for this, so it will take doing some homework on your part to see if your camera does.
Mountain Biking Photography
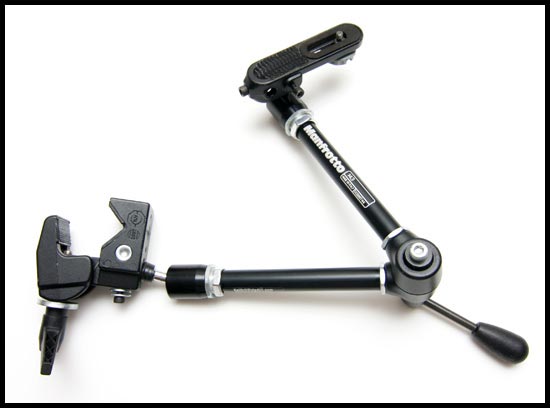
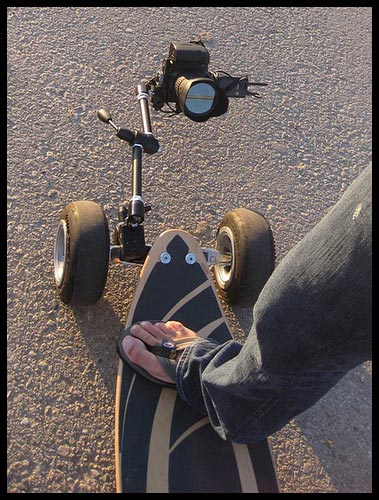
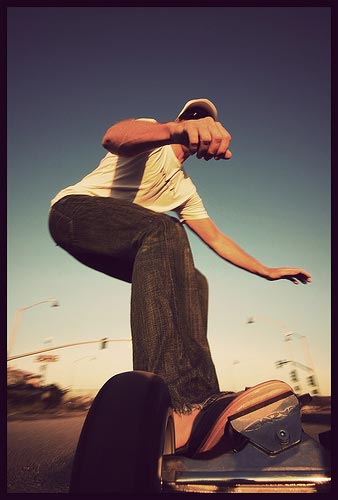
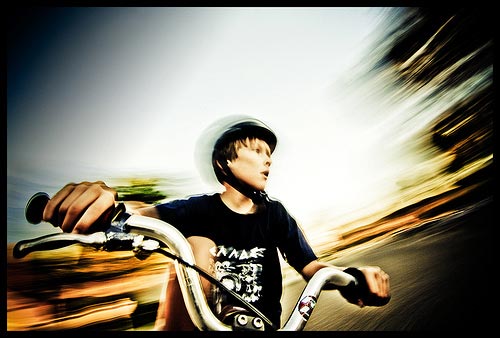
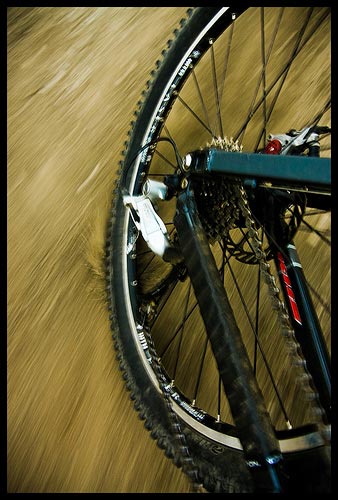
The last photo example in part 2 displayed one of my more unique angles for a mountain bike photo, a shot seemingly from the front tire looking up toward the rider. I explained the photo settings but not how I got the angle. This angle was achieved using a device called a Magic Arm. The Magic Arm is really cool device that allows you to clamp one end to various parts of your bike; while the other attaches to the tri-pod mount on the bottom of your camera. I’ve included a set up and final shot below where we used the Magic Arm for a skateboard shoot.
Camera Mount
Skateboarding – Unique Picture Perspective
Skateboarding – Unique Picture Perspective
With the camera mounted to your bike, there are a few ways to activate the camera. The first and cheapest method would be by using the self timer built into your camera. Set up the shot, fire the self timer, hop on and ride. Having a friend set the timer while you remain on your bike would be big help here. The second and much more expensive option would be to use a pair of pocket wizards. Pocket wizards allow you to remotely trigger your camera. While pocket wizards aren’t cheap they can allow you to explore many new photo possibilities.
Mountain Biking Photography
Mountain Biking Photography
Lighting and Lighting Tricks in Photography
Pocket wizards also play a big role in allowing photographers to explore some off-camera flash techniques. Many people associate the word flash with either nighttime or indoor shooting. One way to really make your photos stand out is by using your flash during the day. Often when you are trying to get your background exposure dialed in for a shot, your subject ends up being dark. Or, when you are setting your exposure on the rider, the sky and background end up getting blown/washed out. By using your flash as fill light during the daytime, you can get both the subject and the background dialed in perfectly. I’ve put a few examples of off-camera and daytime flash below.

Mountain Biking Photography

Mountain Biking Photography
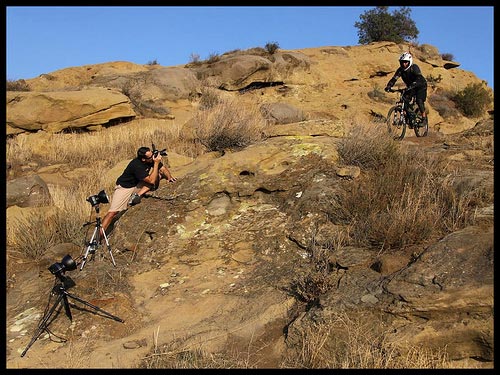
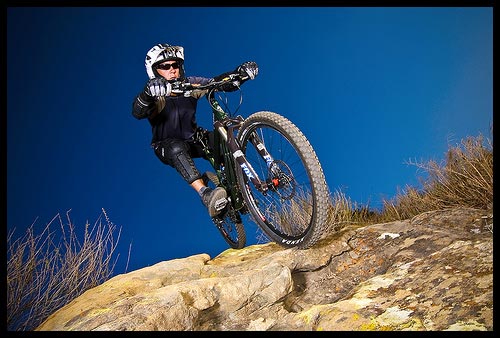
The most expensive and probably most time consuming topic I want to cover involves shooting with larger, more powerful flash units. As I mentioned above, using flash during the daytime can create some great shots; using studio type lights can take it to that next level. Again this isn’t an entry level topic or price point; those who are interested in lighting bigger should read on. There are a couple challenges when using bigger lights outdoors. One is transporting the gear; the other is finding a power source.
There are many companies who offer solutions to both problems by selling kits that are small enough to be hiked into a location and have their own battery pack. The problem until recently for me has been the price. In the past, the battery pack alone would start at about $1,000. One option to consider is Alien Bees. Weird name I know, but great price point and tons of options to choose from, including an “affordable” battery pack. Another option at an even better price is the kit offered from Boling. These are often referred to as “China Bees” due to their resemblance to the Alien Bees and the fact that they are made in China.
I chose the Boling/China Bee set for a couple reasons. The portability as a light weight kit, the price and I felt comfortable hauling them out to a trail and not losing my mind if they were damaged. When hiking into a location, I can carry this kit on my shoulder, no problem. Notice I said hiking into a location? You won’t be carrying this type of equipment with you on a ride. I thought it was important to cover this type of lighting as these are the types of shots most people ask about. I’ve placed a few examples below.
Mountain Biking Photography
Mountain Biking Photography
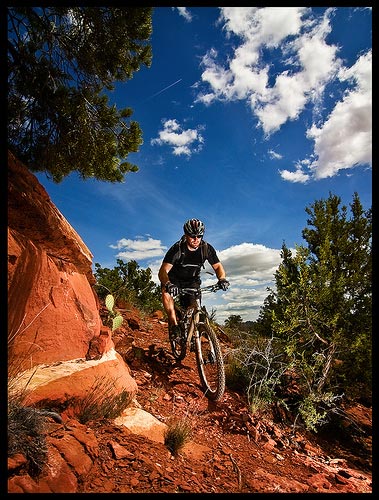
Mountain Biking Photography
For a more in depth discussion and “how to’s” on using all kinds of flash units, I’d recommend stopping by http://www.strobist.blogspot.com/ for an endless amount of quality information.
Thanks again for reading. If I’ve done anything, I hope to have inspired you to get out and try new things. I love looking at mountain bike photos too…so keep on posting your shots!
If you’d like more information on something I’ve mentioned or just have a general question, please drop me a line at Keith (at) m5photography.com

