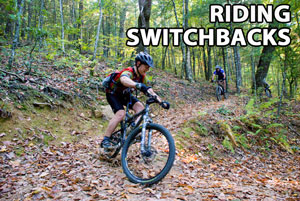
 Switchbacks are a great technical aspect of the trail. These hairpin turns test your balance and general trail use knowledge as you navigate attempt not to dab throughout the course of the turn. Switchbacks add a unique feature to steep terrain as they test your technical riding ability during times of increased speed…or decreased endurance.
Every trail in the country has at least one tight turn you have to ride through, so how do we conquer these turns on our mountain bike both uphill and downhill?
What Is A Switchback Turn?
Before we get into the how of riding switchbacks, what are they and how can you find them on your trail?
Wikipedia:
A hairpin turn (or switchback), named for its resemblance to a hairpin/bobby pin, is a bend in a road with a very acute inner angle, making it necessary for an oncoming vehicle to turn almost 180° to continue on the road. Such turns in ramps and trails may be called switchbacks in American English, by analogy with switchback railways.
Hairpin turns are often built when a route climbs up or down a steep slope, so that it can travel mostly across the slope with only moderate steepness, and are often arrayed in a zigzag pattern. Highways with repeating hairpin turns allow easier, safer ascents and descents of mountainous terrain than a direct, steep climb and descent, at the price of greater distances of travel. Highways of this style are also generally less costly to build and maintain than highways with tunnels.
Switchback turns on your mountain bike trail are pretty easy to find. Any turn that is extremely tight and guides you to riding in the opposite direction you were heading can be called a switchback. On new trails, switchbacks can take you by surprise as you were unaware of the sharp turn ahead.
Riding Switchbacks On Your Mountain Bike
When you come up against that switchback on your trail, there are certain things you need to remember and practice to conquer these tight, hairpin turns.
- Your Line Is Everything – The line you pick to go through the turn will determine your outcome. The video below will show you how to chose that line, but also look for any rocks or roots that are looking to kick you off of that line. There is a preferred method of attacking switchbacks, but if that line is covered up with harder terrain…you might have to improvise.
- Keep Your Balance – This is one of those situations where practicing your trackstanding really pays off. Typically (especially when riding uphill), switchbacks are taken at a very low speed. You need to be able to keep the bike upright and moving forward throughout the entire turn. In really extreme switchback situations, it may even be necessary to stop the bike completely without getting off (trackstanding) to readjust.
- Move Your Weight – When riding a switchback both up and down the trail, you need to be completely aware of where you have your weight on the bike. For steep, downhill switchbacks, your weight needs to be back as you navigate the turn. For uphill, steep hairpin turns…you need to have your weight centered and ready to put forward to get through. Moving your body weight independently of the bike will be a key factor in a dab free switchback turn.
- Look Where You Are Going…Not Where You Are – I see a lot of riders dab and get stuck in switchbacks because they are too focused on where they are…instead of where they are going. Riding switchbacks (like most riding) requires you to plan ahead and keep your head up. If you are looking two inches in front of your tire, you are already stuck. Plan your turn and look several feet out. As you are navigating the turn…look where you need to go. As you get tired on climbs, this can get harder as it is a natural progression to hold you head down. It’s not right…but it is what your body wants to do.
Now that you have the right mindset, check out this video on riding switchbacks from the crew over at Bike Skills (bikeskills.com).

1 comment
This is some great tips on how to take switchbacks. Just a few more questions from a downhill switchback perspective. Do you want the weight behind the seat or where should you place the weight? Would love to see an illustration of where the weight should be throughout the turn.