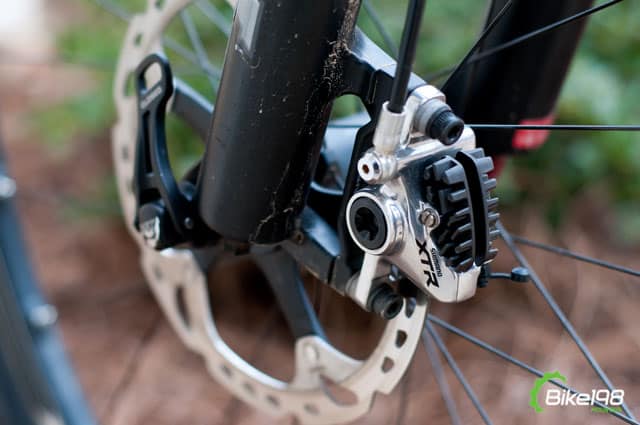
Hydraulic disc brakes for mountain bikes can be one of the most significant upgrades to your current ride. Hydraulic disc brakes provide superior modulation, power and control over their mechanical counterparts (both mechanical disc and cable driven v-brakes). With hydraulic braking systems for mountain bikes, you can stop easier and control your speed with ease as the modulation allows the rider to control their bike in technical and fast riding situations.
You have your new set of hydraulic disc brakes ready to go on your mountain bike…where do we start?
For the best deals on mountain bike disc brakes, check out JensonUSA.com
What is required to install disc brakes?
Before you jump at the chance to upgrade your current mountain bike to hydraulic disc brakes, you need to make sure that your bike has the necessary mounts for installation. These are the mounts you are looking for…
The Fork
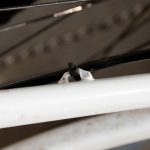
On your suspension fork, you are looking for IS or post mounts for disc brakes. If your bike has post mounts, you most likely already have disc brakes installed. Most 2009 and later forks (if not all) now come standard with post mounts. If you are in the process of upgrading, you are most likely looking at IS mounts on your suspension fork.
Images: Post mount on left; IS mount on right
The Frame
On the rear of your mountain bike frame, you need to make sure that you have those exact same IS mounts on the rear triangle on the non-drive side of your frame. You are going to mount the caliper to these mounts during installation.
The Hubs
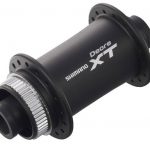
To be disc brake compatible, your mountain bike hubs need to have mounts for the disc brake rotors. These mounts are going to come in one of two different configurations. The most common of these is a 6 bolt mount on the hub body that looks like the picture below. Shimano also makes their own proprietary Centerlock system which will be found on some of their hub sets.
Images: 6 Bolt on left; Centerlock on right
Your mountain bike doesn’t have these mounts?
If your mountain bike has the required mounts, but your hubs do not…a new set of wheels are going to be required. If your frame or fork does not have the IS or post mounts for disc brakes, you will not be able to install the brakes on your bike.
Installing Disc Brakes for Mountain Bikes
For the purposes of this article, we are going to assume that your hydraulic lines are the correct length for your frame. In many cases, the stock length will work perfect and trimming the hydraulic lines may not be needed. If you lines are too long for your mountain bike frame, you should have them fitted to your bike.
Before we start…
Before you start the installation process, make sure that all of your parts match. Your mounting brackets should match up with your rotor size. Typically, rotors come in these sizes…140mm, 160mm, 180mm, 183mm, 185mm, 203mm. The caliper mounting bracket determines how high the caliper sits off the frame to contact the correct rotor size.
Tools Required
- T25 Torx Wrench for the caliper bolts
- 4 or 5 mm Hex Wrench
- Torque Wrench Preferred
Step 1 – Mount the Rotors to the Hubs
To get started with the process of installing your new hydraulic disc brakes on your mountain bike, we need to install the rotors on your hubs. Install the disc brake rotors on your mountain bike hubs using the T25 Torx wrench. Typical mounting requires 40-60 in lbs. of torque. Be careful with the torx bolts because they strip very easily. Every bolt should have blue lock-tite already applied to prevent vibration loosening. Once this is complete, install the wheels back into the dropouts with the brake rotors mounted.
Step 2 – Mount the Rear Lever to the Bars and Feed Line
The first step in this process is to mount the rear lever to your bars and feed the line to the rear triangle of your frame. Once you have properly fed the hydraulic line through the correct mounts on the frame, bolt the caliper mounting bracket to the frame, tighten the bolts and loosely attach the caliper to the mounting bracket. Do not tighten down the caliper bolts at this time.
Step 3 – Mount the Front Lever and Feed Line Through Fork
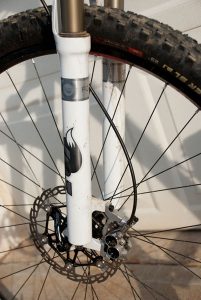 Now, mount the front brake lever and feed the line through the inside of the suspension fork. At this point, you can feed the line to the inside or outside depending on your preference. As you can see by the picture, I like to keep the line out of the way and out of sight. Make sure that the hydraulic line for the front brake is still well organized with the rest of your shifting cables and rear brake line.
Mount the correct caliper mounting bracket, tighten those bolts (typically around 80 in. lbs. for post mounts and 110 in. lbs. for IS mounts) and loosely attach caliper to the mounting brakets leaving the top two bolts un-tightened at this time.
Step 4 – Secure Hydraulic Lines
Disc brake ready frames have mounts down the frame tubes that will secure the hydraulic lines. Use small zip ties and cut the excess as you go. On the suspension fork, secure the brake line using a supplied mount or by using a medium zip tie around the arch of the fork. Make sure that the line is completely out of the way of the spokes as the wheel turns.
At this stage in installation, turn the bars from the extreme left to the extreme right and make sure that all of the lines and shifter cables interact correctly with each other. If there are any conflicts…now is the time to make adjustments.
Let’s Get to Adjusting Your Disc Brakes!
Now that the brakes are on the frame and secure…it is time to get these massive stoppers adjusted and ready for trail action. When you have properly adjusted hydraulic brakes, all is great in the mountain biking world. Improper adjusting can mean brake drag and noise, and both of these equal unhappy riders.
Adjusting the Brake Levers
The first step in adjusting brake levers is making sure the lever is positioned horizontally on the bars to fit your hands. I, like a lot of riders, prefer one finger braking with quality hydraulic brakes. I make sure the levers are inboard enough to make this comfortable for all day riding. Experiment some and find your comfortable spot.
For lever height, I wait until I have properly adjusted the brake calipers.
Adjusting the Brake Calipers
Note: The following tips for adjusting mountain bike disc brake calipers apply to post mount style calipers like the ones pictured. Some older disc brakes are IS calipers that require shimming to get correct alignment with the disc brake rotor.
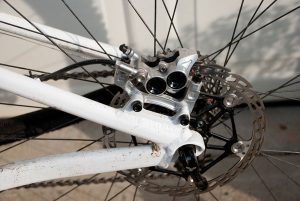 Remember when we left the calipers loose on the mounting brackets in the above steps? This is why…we need to adjust the lateral positioning of the brake calipers so they do not come in contact with the brake rotors during free spinning. When you have drag, you have to exert extra energy to move the wheels. When the calipers are not straight with the rotor, this can result in brake howl and other annoying noises on the trail.
I have found the following directions this easiest when adjusting mountain bike brake calipers:
- Spin the wheel using your hand or cranks.
- Slowly compress the brake lever and hold.
- Tighten caliper bolts to 60 in. lbs.
- Release lever.
- Spin wheel to check for drag.
It doesn’t get much easier than that. With some brakes, this doesn’t work right away. If you are having a hard time getting out all of the drag in your hydraulic brakes, try this method.
- Slowly spin wheel.
- While wheel is spinning, position caliper by hand into position where there is zero drag.
- Keeping the wheel spinning, tighten caliper bolts.
Adjusting Vertical Position of Brake Levers
Now that everything is set and ready to go, lets get those brake levers exactly where we want them. Tighten the brake lever bolts to the point that they do not slip, but you can still move them by hand. Ride your bike around a flat area with the saddle height at your usual ride setting. Position the brake levers to that your hands comfortably rest on the levers. Once you find your sweet spot, slightly tighten the levers into place. Ideally, you want the levers to move under hard hits but not during riding to help prevent damage during wrecks.
Everything Is One and Adjusted – Now What?
Ready for the trail?! Not quite yet. You need to get out and bed-in/break-in your pads and rotors. The easiest and fastest way to accomplish this is by finding a straight road that declines with as little traffic as possible. When you are at the top, pedal up to speed and gradually apply the brakes. Do not apply the brakes to the point that they lock up. The idea is to brake evenly and consistently across the rotor surface. Repeat this process several times until you really feel the brakes start to bite.
After this process is complete, recheck caliper positioning and hit the trail!
Tools Used In Disc Brake Install
- T25 Torx Wrench for the caliper bolts
- 4 or 5 mm Hex Wrench
- Torque Wrench Preferred
Check out JensonUSA for the best deals on brakes and forks.
