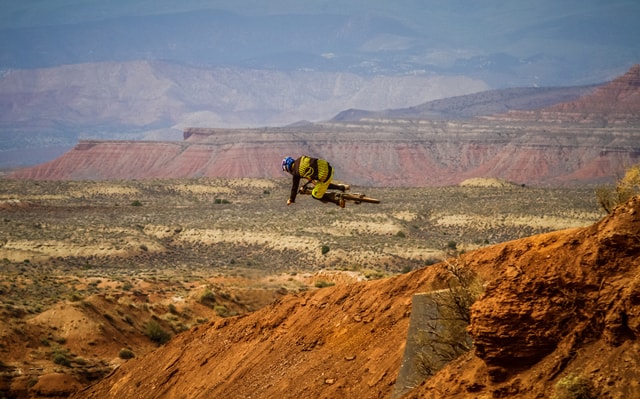
Photography and video has become a huge part of mountain biking in recent years. With the introduction of high quality point and shoot cameras, DSLR hydration packs and the infamous GoPro Hero, mountain bike rides and vacations are getting more pictures shared throughout the community on a regular basis. Never before have we been able to share multimedia on such a large scale (thanks technology and social media).
There are an increasing number of riders looking to take better mountain biking pictures due to the ease of use of today’s cameras and the quality they put out. At Bike198, we find that photography plays a large role in sharing our rides and that is why we have formed groups like the Bike198 Flickr group and featured those images from our readers on the site like you can see here.
So let’s dive into the nuts and bolts of mountain bike photography with some resources and suggestions as you look to capture your rides and share your images with the world.
The Equipment: What do I need to take mountain biking pictures?
While there are those that believe you can only get great pictures with the most expensive equipment on the market…that is just not true in today’s world. The reality is that the camera on your phone will do a great job for web use if the lighting is right. Will you have a harder time shooting fast moving objects in darker, shadier areas? Of course…but the best camera is always the one you have with you and you actually use.
A huge step up from the camera on your phone that won’t break the bank is to get a high quality point and shoot camera. These have several advantages over heavier DSLR’s for mountain biking.
- They are easy to carry in your existing hydration pack or even jersey pocket.
- They do not have the added weight that can slow you down over longer rides.
- There is no need to worry about lenses.
- Modern point and shoot cameras put out some amazing quality even in low light due to larger sensors and better built in lenses.
- You are more likely to take it with you if it is easy to handle.
It used to be that point and shoot cameras really needed ideal lighting conditions to take a decent image. Thanks to modern sensor technology, your smaller format point and shoot cameras are taking better pictures than ever. In some cases, they are actually better than more budget DSLR’s especially if you are not using nice lenses with them.
What are our recommendations on a good camera?
If you aren’t going the DSLR route, the Canon Photoshot S110 and the Sony RX100 II are the best bet. While the Sony has the latest in sensor tech…it is pretty expensive for a point and shoot. The Canon dollar to features is probably the best bet for most riders.
How do I carry my camera?
If you are going the point and shoot or phone route…your job is easy…just throw it in your jersey pocket or hydration pack. If you are going to try to carry around a DSLR and/or multiple lenses…there is really only one option on the market that truly works and doubles as a hydration pack…the Clik Elite Probody. Luckily…we have already reviewed both on Bike198! Click the link below to check out the review.
How To Take Mountain Biking Pictures: Tutorials and Examples
We all know that you can take horrible pictures with expensive cameras and great pictures with cheap ones. When it comes down to taking great mountain biking pictures, it is about the process and not the equipment. While the equipment can make things easier and set you up for a better shot, if you do not know how to take a picture to begin with…the shot is going to be junk no matter what you use.
A good friend of Bike198, M5 Photography (took the featured image above), put together this series of tutorials on taking mountain biking pictures. It is a great way to get started and gives some great examples of work that will give you ideas on what you can do on your next ride.
How to take mountain biking pictures: Part 1, Part 2 and Part 3
If you want some other great examples of mountain biking photography (and other photography), Regular Joe Photography (Facebook page | website) is another great source that has taken some fantastic riding and racing pictures over the years.
Through the use of tutorials and looking at other photographers work that you admire, you will begin to get ideas on how you want to take shots and develop your own style. The next step…just get out there and start shooting. The more you shoot…the more experience you will get which will ultimately make you better at the craft you are trying to develop. It is no different than riding. The more you do it…the better you get.
We also found this great infographic (as if you haven’t gotten sick of seeing enough of these around the net) that shows the basics of camera terminology and what the specifics do for your shot. You can check that out by clicking the thumbnail below (thanks Photography Degree!)
Capturing your rides can expand the passion you have for riding. It can also provide years of enjoyment for yourself and the people you ride with as you look back on memories and relive your favorite times on the trail. Taking mountain biking pictures should not be overwhelming or discouraging. Everyone starts somewhere and whatever way you capture the experience is a good one. If you are up for it…just get out there and try.
Once you start getting a couple…join our Bike198 Flickr group so you can get your images featured on the photo page!


